
One of the best things in modern IT, especially in the Cloud, is that we can perform most of the tasks programmatically. That also means that we can automate most of the jobs, which is excellent.
In this blog post, I will show you an easy way how you can initiate tasks in the Azure environment with your favorite Voice Assistant. This solution works with Cortana, Google, Alexa, and Siri.
Automation of the task
Voice Assistant can’t build a demo environment, turn on/off VMs, backup files, or any other Azure task for us. We have to automate that part on our own, using tools that we have available in Azure.
In this demo, I will use Azure Automation Runbook, but this guide will also work with Azure Functions, Azure DevOps and GitHub Actions.
I have created Azure Automation PowerShell Runbook and enabled a Webhook for it. If you want to follow up with this example, here is a simple non-destructive Azure Runbook for you to use:
1
2
3
4
5
6
7
8
9
10
11
12
13
14
15
16
17
18
19
20
21
22
23
24
25
26
27
28
29
30
31
32
33
34
35
36
37
38
39
40
41
42
43
44
45
46
47
48
49
50
51
52
Param
(
    [Parameter (Mandatory = $false)]
    [object] $WebhookData
)

# If runbook was called from Webhook, WebhookData will not be null.
if ($WebhookData) {

    Write-Output "Logging into Azure subscription using Az cmdlets..."

    $connectionName = "AzureRunAsConnection"
    try
    {
        # Get the connection "AzureRunAsConnection "
        $servicePrincipalConnection=Get-AutomationConnection -Name $connectionName

        Add-AzAccount `
            -ServicePrincipal `
            -TenantId $servicePrincipalConnection.TenantId `
            -ApplicationId $servicePrincipalConnection.ApplicationId `
            -CertificateThumbprint $servicePrincipalConnection.CertificateThumbprint

        Write-Output "Successfully logged into Azure subscription using Az cmdlets..."
    }

    catch {
        if (!$servicePrincipalConnection)
        {
            $ErrorMessage = "Connection $connectionName not found."
            throw $ErrorMessage
        } else{
            Write-Error -Message $_.Exception
            throw $_.Exception
        }
    }

    Write-Output "Hello I am connected now ..."

    # Get VM info from the $WebhookData
    $VMs = (ConvertFrom-Json -InputObject $WebhookData.RequestBody)


    foreach ($VM in $VMs) {

        #Get VM PowerState:
        $VMObject = Get-AzVm -ResourceGroupName $VM.RGName -Name $VM.VMName -Status
        $VMStatus = ($VMObject.Statuses | Where-Object Code -like "*PowerState*").DisplayStatus

        Write-Output = "PowerState of VM $($VM.VMName) is: $VMStatus"
    }
}
HERE you can find a slightly extended and more usable version of this Runbook allowing you to bring VMs Up or Down, depending on the current VM status. That can be useful for demo environment. Runbook we just created is only accessible after signing in to your Azure account. To be able to execute it by an external service, we need to create a Webhook. That allows a particular Azure Automation Runbook to be executed through HTTP request.
Creating a Webhook is an intuitive process, but if you are not familiar with how to do that, HERE is an excellent guide explaining everything you need to know. Just don’t forget to copy the URL of the Webhook because you will not be able to view that later.
When the Webhook is created, we can call it with a simple Invoke-WebRequest command. Here is an example:
1
2
3
4
5
6
7
8
$uri = "<webHook Uri>"

$vms  = @(
            @{ Name="VM01";ResourceGroup="RG01"},
            @{ Name="VM02";ResourceGroup="RG02"}
        )
$body = ConvertTo-Json -InputObject $vms -Compress
Invoke-WebRequest -Method Post -Uri $uri -Body $body
Go ahead and try it out. We will need values of $uri and $body variables for the next part.
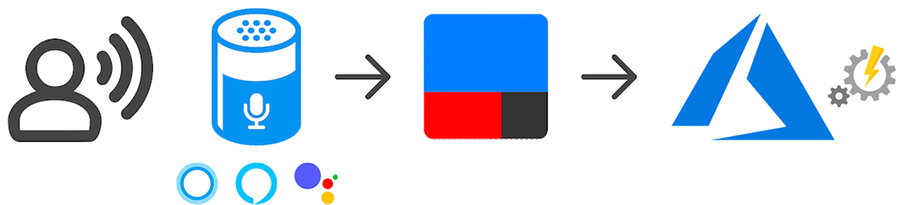
Calling this Webhook will run the Runbook we just created. Now we just need to make our Voice Assistant to call that Webhook instead of us.
Cortana, Alexa, and Google Assistant
IFTTT
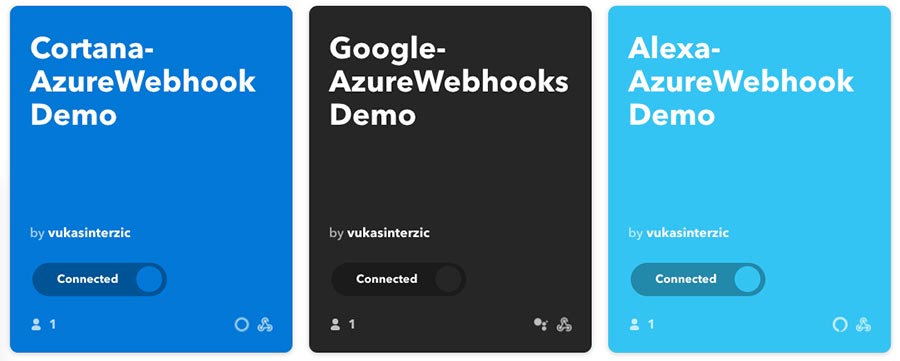
We are not going to create things like Alexa Skills, or Google Play Apps. Instead, we will use a service called If-This-Then-That - IFTTT.com. If you are already using smart home automation or voice assistant of any kind, you are probably already familiar with this service. If you aren’t using it already, go ahead and register for a free account.
The configuration of Cortana, Alexa, and Google Assistant is very similar, and I will show it in one example.
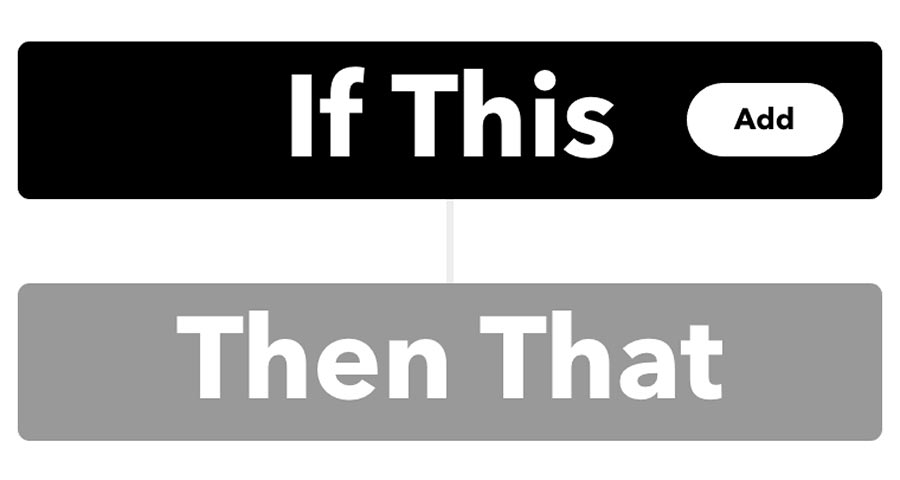
If This
First, we need to configure If This part. That is our trigger for the action. And trigger will be a voice command to the voice assistant.
Click Add, and search for Cortana, Alexa, or Google. You will have to authenticate and give access to IFTTT to work with your assistant.
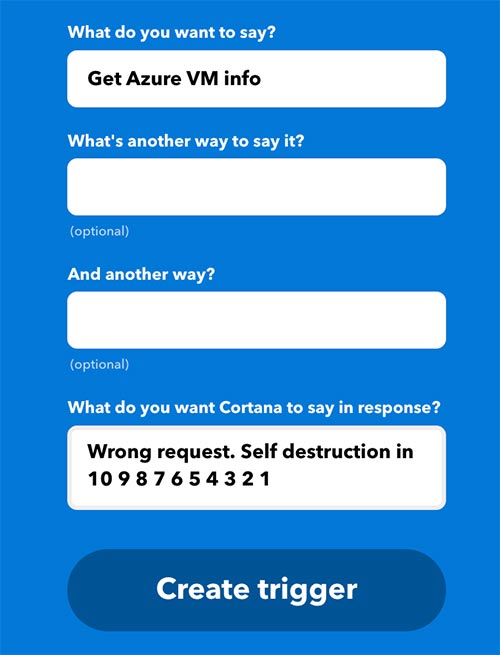
We have several options on how to execute this. I will select “Say a specific phrase”, but you can choose whatever works best for your use case. If you want to be able to say a specific VM name and pass that as a parameter, select “Say a phrase with text”.
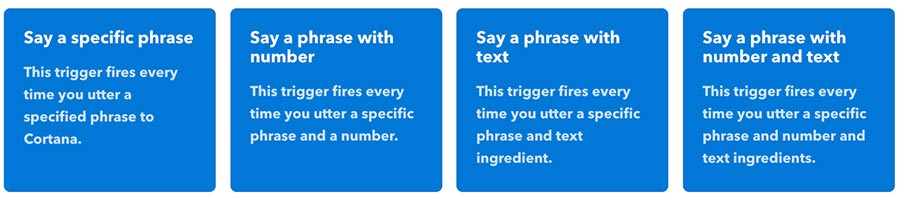
Now specify a sentence or phrase you would like to say to your assistant to initiate this action. You can provide few versions and also the answer you expect to get. And finally, click the “Create Trigger” button.
Then That
Then That is where we define what action will happen when the applet is triggered. This is where we want to trigger our Webhook.
Search for Webhook. We will need the same information as we were providing to the Invoke-WebRequest command. First is the URL of your Azure Automation Webhook. Then the Method POST, and finally JSON body with our parameters.

In case you selected the option “Say a phrase with text” in the previous step, you can replace, for example, VM name with the ingredient Text Field option.
Click the “Create action” button, and give your applet a descriptive name.
And that’s it! When you say a specific sentence to Cortana or Google Assistant, they will make a web request to initiate our Webhook, which will trigger the Runbook! Alexa requires more specific wording, you have to say “Alexa trigger ‘Your applet name’”.
To find out if everything worked properly on the Azure side, you can go to the Azure Portal, Automation Account, Runbooks, and look at the Jobs.
Siri
Configuration of Apple’s Siri works differently. We can configure it with or without IFTTT, and I will describe both options here.
Option 1: Siri Shortcuts
On iOS devices, we can create a Siri Shortcut, that will call Azure Webhook directly.
To do that, go to the Shortcuts on your iOS device, and click the plus sign to add new.
Click on Add Action and find URL. Here you need paste the URL of you Azure Webhook.
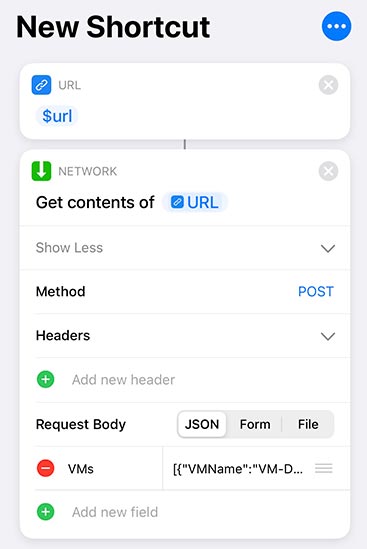
As a second Action, add Get Contents of URL. This is connected to the first action, and it will only be available after you add the URL. Here is where we configure how our Webhook is triggered. Click Show More, select Method POST, Request Body JSON, and click Add new field - Text. This is where we need to paste the content of our $Body variable from PowerShell example above.
Here is how your configuration should look like (replace $URL with your URL):
Notice that Shortcut is putting our Webhook body info inside of another object. To deal with that, we need to replace a line in our Webhook:
Replace this line
1
    $VMs = (ConvertFrom-Json -InputObject $WebhookData.RequestBody)
with this
1
2
    $Data = (ConvertFrom-Json -InputObject $WebhookData.RequestBody)
    $VMs = (ConvertFrom-Json -InputObject $Data.VMs)
Save your iOS Shortcut with the name that you want to use as a phrase for Siri. And test it out :)
The next step would be to pull out that information from Azure Runbook and have the Siri show you the results directly on your phone :)
Option 2: Siri Shortcuts with IFTTT
Using Siri with IFTTT can be useful if you want to integrate it with something else.
This process is different from what we did for other Voice Assistants. We still need to create a Siri Shortcut, that Shortcut will call Webhook of IFTTT, and IFTTT will then call the Webhook in Azure.
THIS official guide nicely describes how to configure everything.
Configuration of IFTTT applet and Siri Shortcut should look like this:
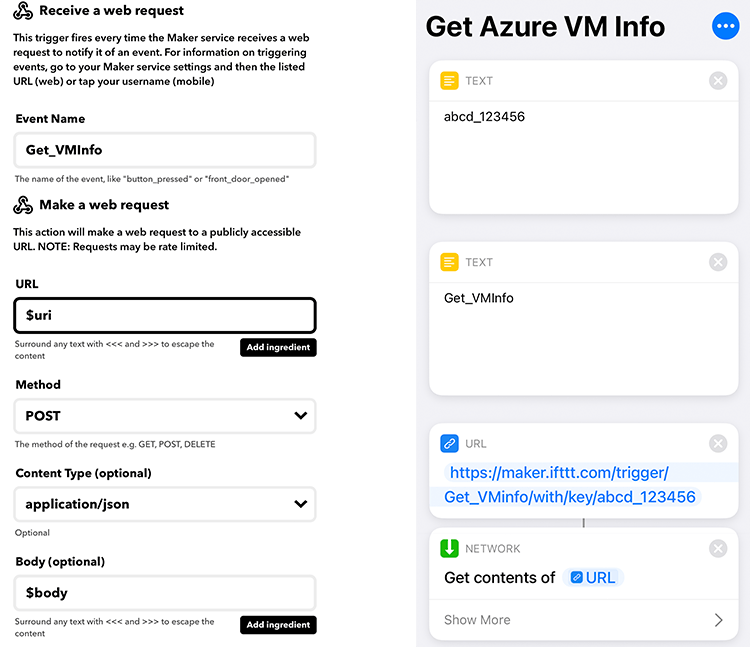
Just say “Hey Siri, Get Azure VM Info” and you will run your Azure Automation Script.
Conclusion
It might sound like a gimmick, but this can be very useful in some situations. You can use it to perform any task that you can script. Here are some examples:
Assign yourself (or someone else) elevated access rights needed to perform a task, and quickly remove later. This can be within IaaS servers, Windows AD, or Azure. If you are not using JIT/JEA, simplifying this task leads to not using the elevated account permanently because it’s a hassle to deal with every time you need it. “Cortana, make me a domain admin/subscription contributor for 20 minutes.” “Hey Siri, open RDP port on VM1 for 30minutes.”
Turning on/off, provisioning/deleting different demo, test, or management resources. It turns out that a simple sentence like “Hey Google, turn off my demo VMs” can save a lot of money or Azure credits.
Starting any automated task that you run frequently but not on a schedule.
Allowing normal users to do things that they wouldn’t be able to do without knowing how to run a script.
Using “ingredients” allows us to provide specific information, such as VM name or number of minutes, and then pass that over to the Runbook as a parameter. The Ability to work with different tools makes it very powerful and universal.
The Premium version of IFTTT removes limitations, allows more integrations between different applets, and allows more steps, using queries and conditional logic. This opens many other ways to integrate it with other smart home appliances, or IoT.
I can’t finish this blog post without saying that using Webhooks and activating them by the voice command brings reasonable security concerns. You are also sharing the Webhook info with at least two 3rd parties. You have to think about the possible damage and make your solution with counter measurements. Also, don’t let your pet parrot (or toddlers) hear you asking Alexa to delete something in Azure.
I hope this was useful. Thank you for reading and keep clouding around.
Vukašin Terzić